
Table of Contents
Portainer
Portainer is a container management tool that makes it easier to deploy and manage container-based applications without hassling with platform-specific code.
You also get a very clear overview of all installed docker and can also check specific docker applications for more detailed information. Normally you have to use a terminal to manage Docker, but with this tool you get a web interface. You can also access this remotely through a secured internet.
I will introduce that secured setup in my next blog post when we setup the Nginx Proxy Manager.
Deploy
Before installing Portainer, make sure you have Docker Engine installed, you can read more about that in this previous post Digital Office – Part 2, Docker.
- Regarding the Portainer manual, we need to create a docker volume for Portainer.
sudo docker volume create portainer_data
- After that use the following Docker commands to deploy the Portainer container.
Note that we need to add an extra variable to use this Portainer local.
[ -v /var/run/docker.sock:/var/run/docker.soc ]
sudo docker run -d -p 8000:8000 -p 9000:9000 --name=portainer --restart=always -v /var/run/docker.sock:/var/run/docker.sock -v portainer_data:/data portainer/portainer-ce
When we do a Reverse Proxy with NGINX Proxy Manager later (in the next blog post). We will change this command above a little bit, to re-deploy the Portainer with possibility to obtain trusted SSL certificates. Because we created the docker volume before, all settings we may have done will be still there.
Also remember that when you use NGINX Proxy Manager with Portainer, you have to place both containers in the same network. Then don’t expose the admin port 9000 because you will set that in NGINX Proxy Manager.
Portainer Web User Interface
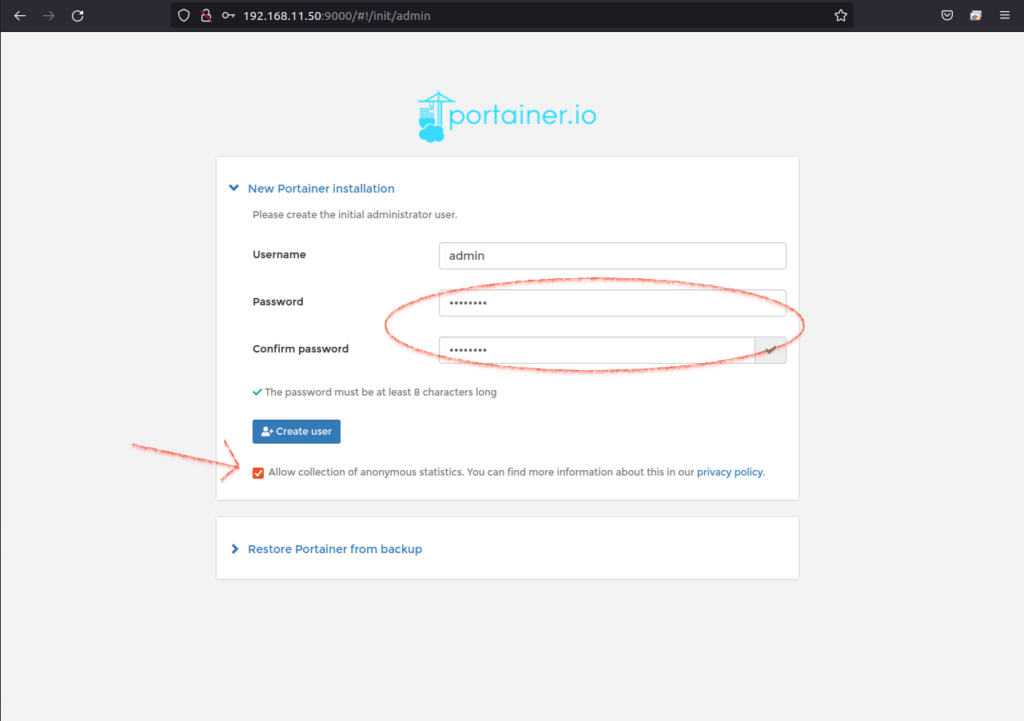
- You log into the Portainer with your local server IP and port 9000 , for example: http://192.168.0.13:9000
- When you for the first time log into the Portainer you will have to create a password. Once again please use a strong password when setup a real server.
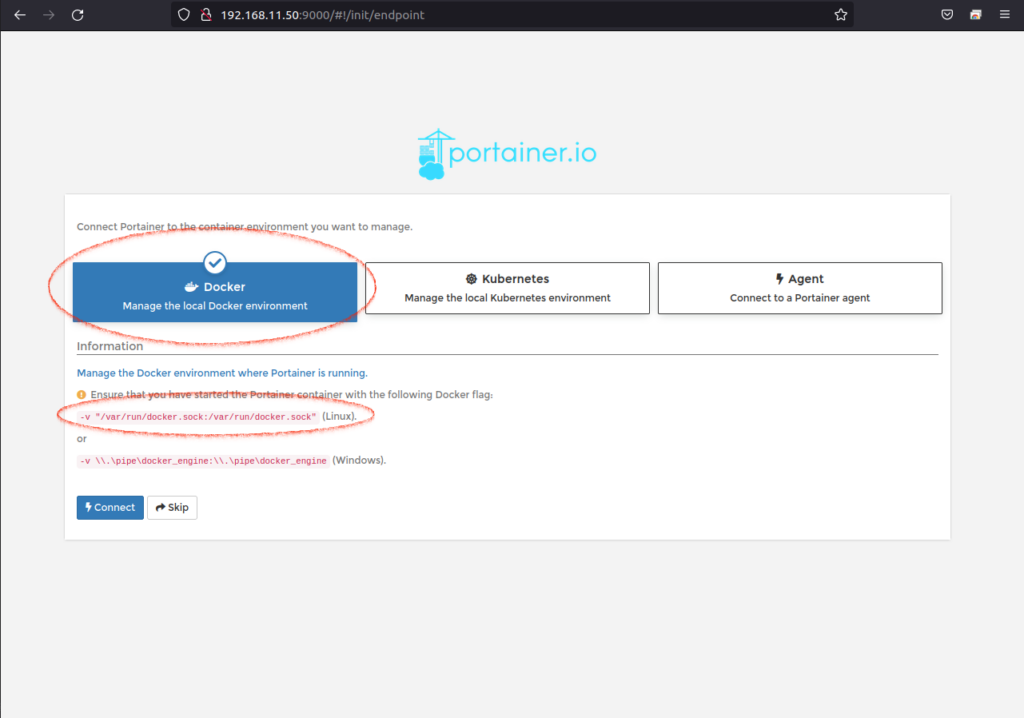
- After that you need to choose your docker environment. Because we are working on a local server we choose the local Docker environment. There are other options too, we may cover them in future.
And you see here at the second red circle, there is this extra value parameter we had to add in our deploy command for Portainer.
Fast overview on the Web UI
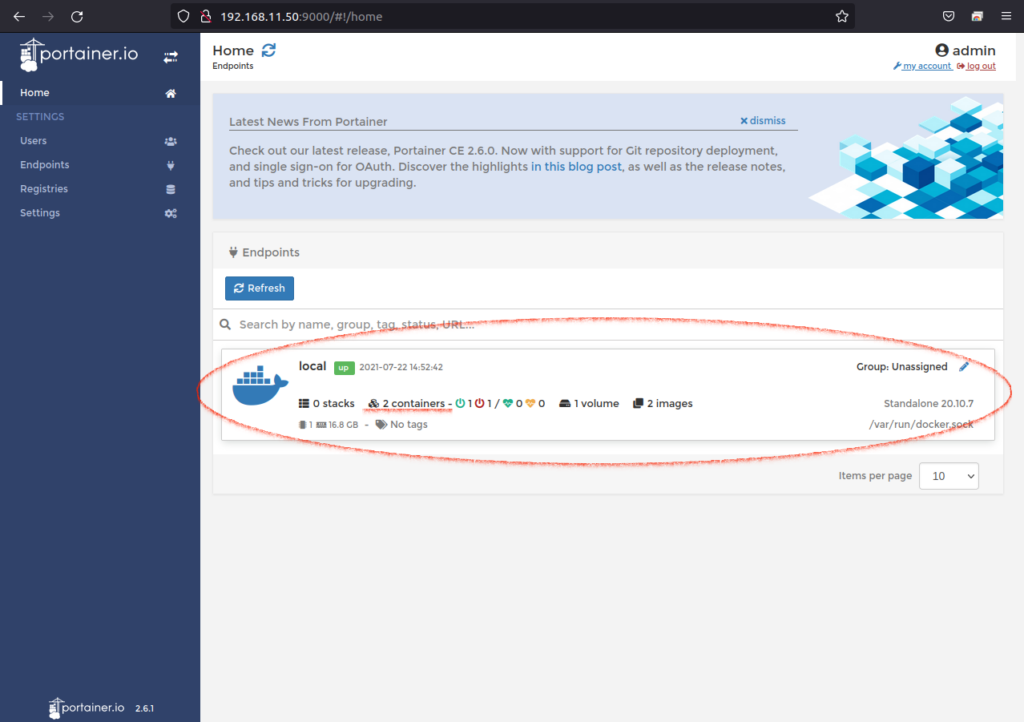
- You should now see the Home Dashboard. If you following this guide you should also see
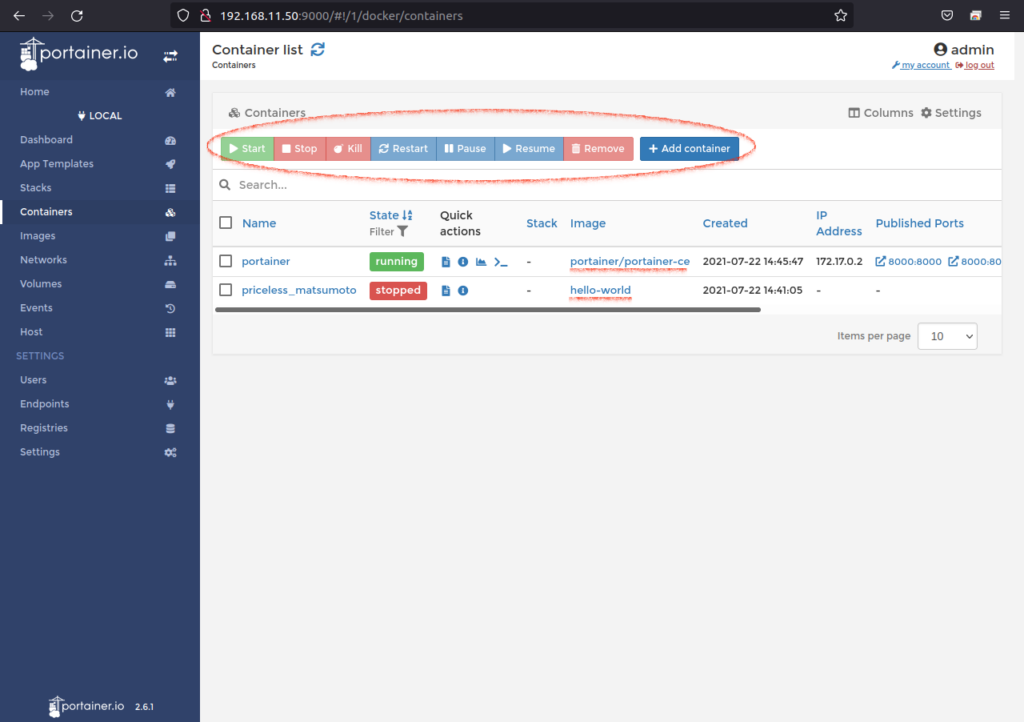
- 2 containers, 1 running and 1 turned off.
- Portainer is using one container and the previous test deploy “Hello World” is also using another one. Portainer can see all existing containers in the local Docker even if you haven’t deployed them through Portainer.
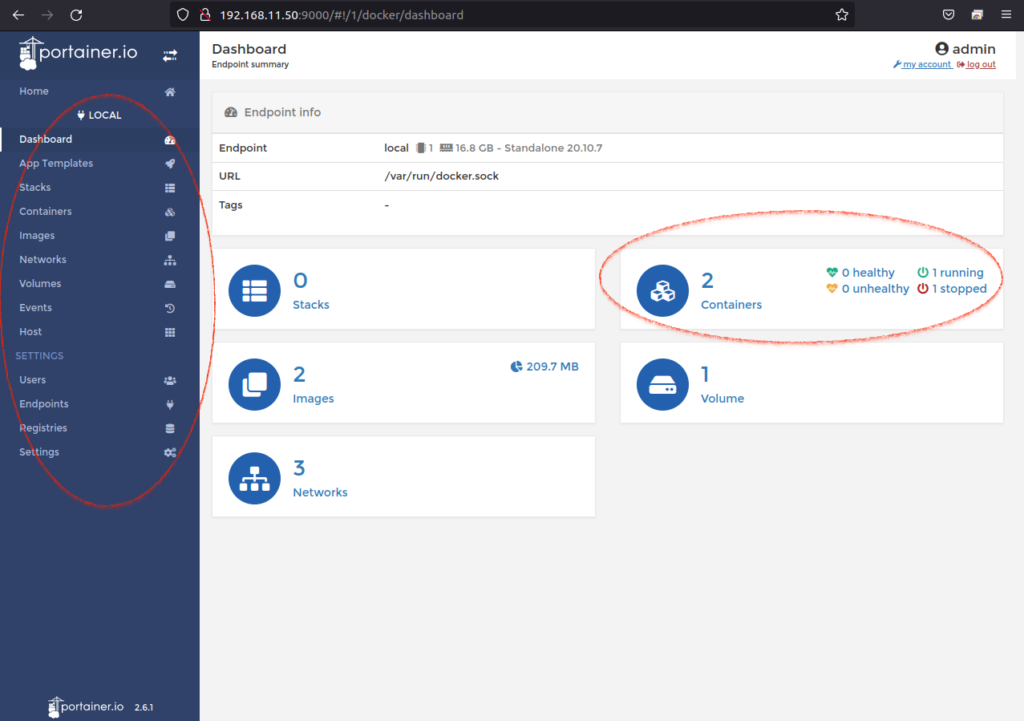
Click on the local Docker and there you can see more details about all containers.
- You also see now the menu on the left side has changed a bit. It gives you control over volumes, network, stacks and etc in this local Docker. I do not cover them in detail in this post. May cover them later when doing some in depth setups. You can also find more information by yourself at their Portainer manual.
- Click on the Containers to get into more info about what containers is deployed.
- When deployed a container through a terminal it may limit your control over the container therefore you probably will see a “Limited” mark on the container.
I do recommend deploying a container through Portainer if it’s possible. I will do that in the next blog post when we setup the Nginx Proxy Manager.
This is all for this post, I did just scratch on the surface about Portianer. But to keep it simple I didn’t take it too deep in details. I was thinking of doing that when we start to introduce more containers into our Digital Office setup.
If something is not clear or needs more explanation please comment about it. I will gladly read and answer them.
Keep tune in here for the next post about “Nginx Proxy Manager” setup.
Until next time, stay safe and happy experimenting.