
Table of Contents
Preparation
To follow this guide you need to have Docker Engine, Docker Composer and Portainer installed. If you don’t have that please refer to the previous guide of this series.
Nginx Proxy Manager
Nginx is an HTTP and reverse proxy server, a mail proxy server, and a generic TCP/UDP proxy server. It can be very complicated to use if you are not familiar with terminal work.
But with Nginx Proxy Manager it becomes less difficult and easy to see and control what’s going on in your Nginx server.
In this guide we will setup this manager, create DNS subdomain names, make sure the router is port forwarding correct ports and create SSL Certificates for the Nginx Proxy Manager and Portainer.
Deploy
- Login to Portainer and choose your local Docker. From there click “Stacks” on the left menu and then “Add stack”.

- Name your stack, I named the new stack “nginxproxymanager”.
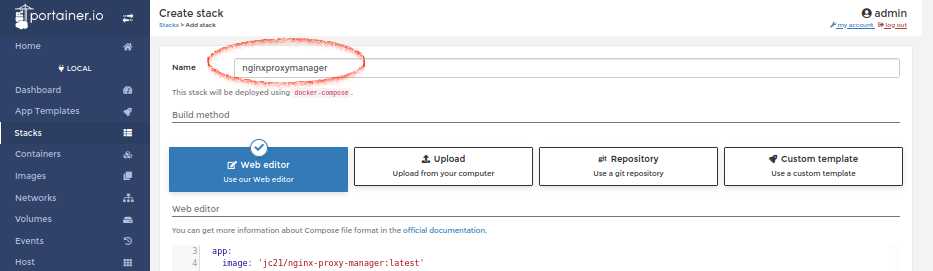
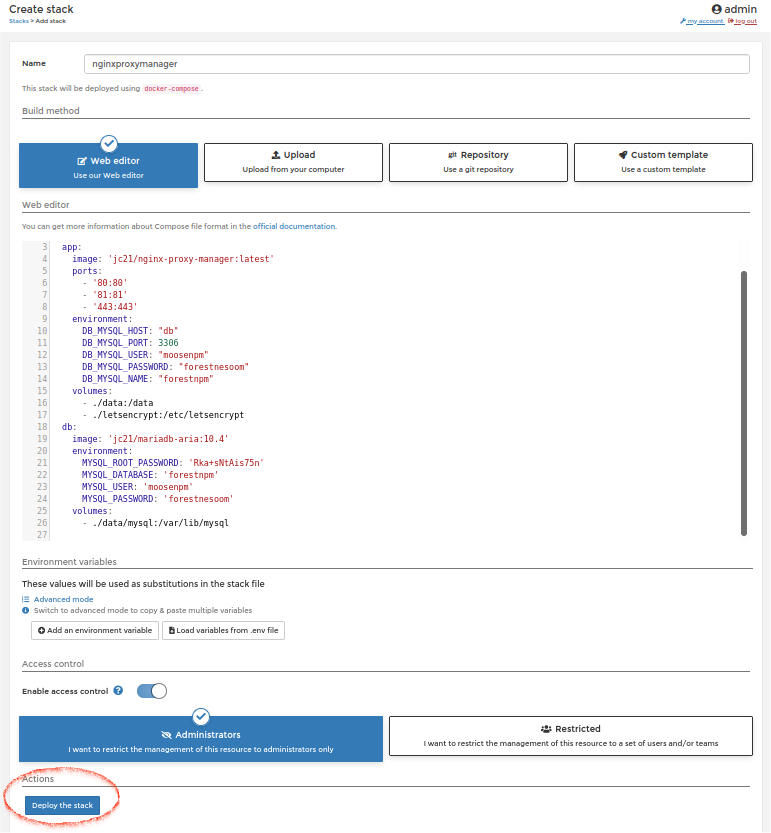
- Then paste this composer example code into the “Web editor” window.
Don’t forget to edit your user, password and database name.
Make the password strong if you plan to put this setup on the internet.
When you create own username, database name and password make sure they match like this, or else you will get errors:- DB_MYSQL_USER = MYSQL_USER
- DB_MYSQL_PASSWORD = MYSQL_PASSWORD
- DB_MYSQL_NAME = MYSQL_DATABASE
- MYSQL_ROOT_PASSWORD = Its unique
					version: '3'
services:
  app:
    image: 'jc21/nginx-proxy-manager:latest'
    ports:
      - '80:80'
      - '81:81'
      - '443:443'
    environment:
      DB_MYSQL_HOST: "db"
      DB_MYSQL_PORT: 3306
      DB_MYSQL_USER: "npm"
      DB_MYSQL_PASSWORD: "npm"
      DB_MYSQL_NAME: "npm"
    volumes:
      - ./data:/data
      - ./letsencrypt:/etc/letsencrypt
  db:
    image: 'jc21/mariadb-aria:10.4'
    environment:
      MYSQL_ROOT_PASSWORD: 'npm'
      MYSQL_DATABASE: 'npm'
      MYSQL_USER: 'npm'
      MYSQL_PASSWORD: 'npm'
    volumes:
      - ./data/mysql:/var/lib/mysql
- Then press on “Deploy the stack”.
This can take time if it’s the first time you are doing this. When it’s done a new page appears.
- When it’s done, browser return automatically to Stack list page and we will see the new stack we created “nginxproxymanager”. Click on the that name to see what container it runs.
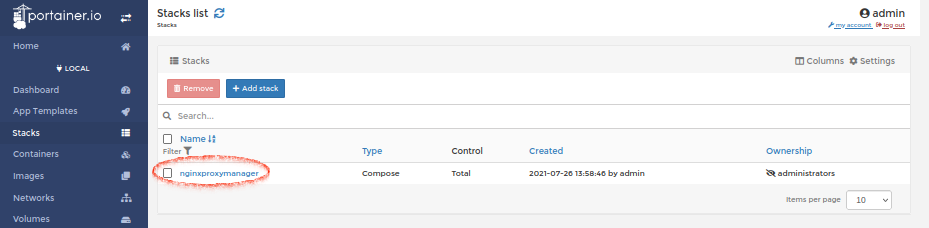
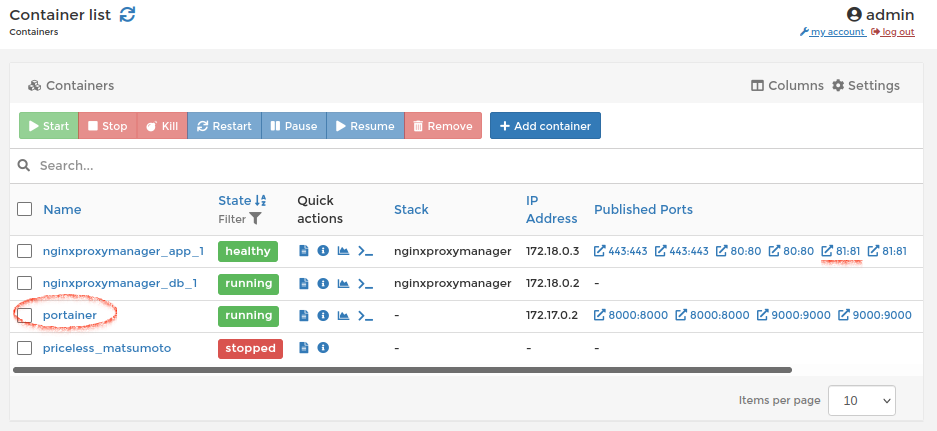
As you see here, the Nginx Proxy manager is running 2 containers. One for the application and another one for the database. Take a note on the name of the container that runs the application, “nginxproxymanager_app_1”.
We will need that name later when we setup the Proxy Host in Nginx Proxy Manager.If you scroll to the right and find the port 81:81, that is the Nginx Proxy Manager application port. If you click on that now, you will probably not be able to connect to the application.

- This is because the Endpoint of the local dockers IP is not correctly setup. To fix that we need to enter the “Endpoints” section on the menu to the left and click on the “local” endpoint name.
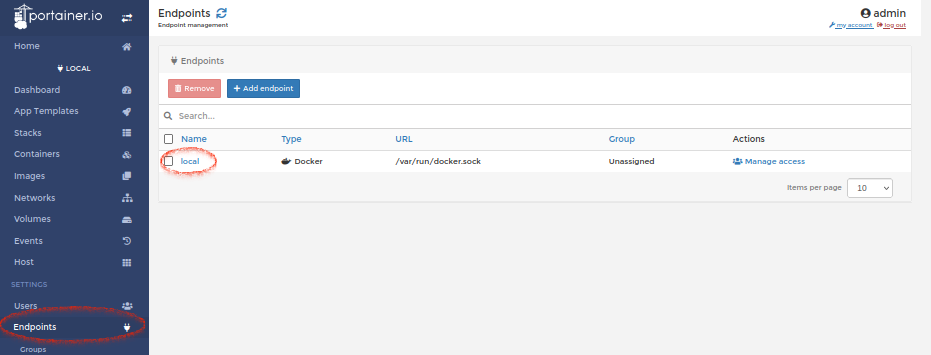
- Add the IP number to your server. In my case the 192.168.11.50 is the local IP address. Then click on “Update endpoints”.

- Click also on the “Network” on the left menu and write down the Nginx Proxy Manager’s network name. We need that later too when we redeploy the Portainer.

- Now go back to the containers, write down the name of the Portainer container “portainer” because we need that for Nginx and when we redeploy the Portainer.
After that on the “nginxproxymanager_app_1” row scroll to the right and click on the port 81:81 to access the application.
First time settings
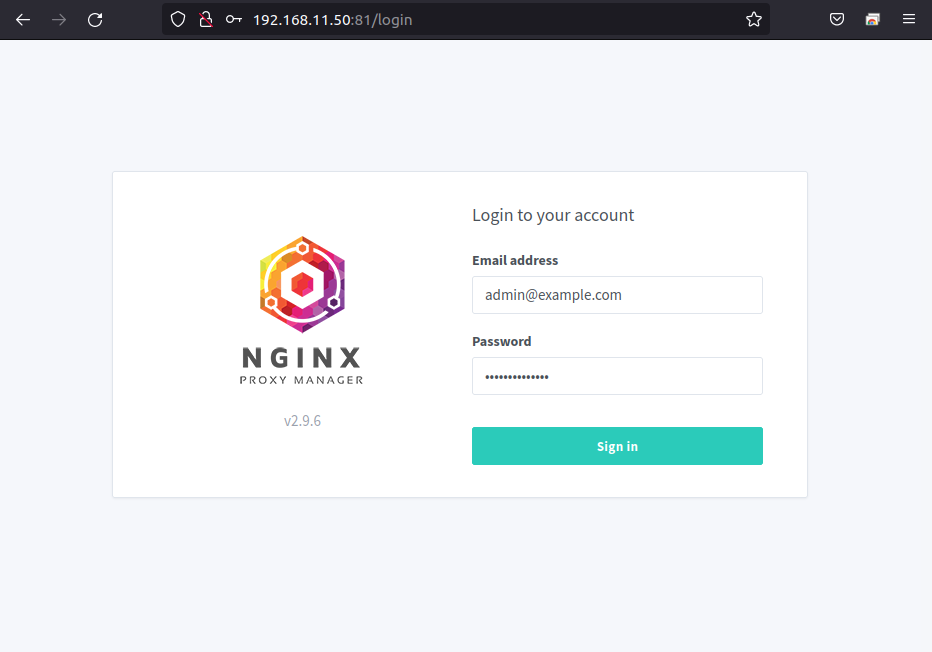
- A new window appears, the Nginx Proxy Manager. When logging in for the first time, use default username and password:
- admin@example.com
- changeme
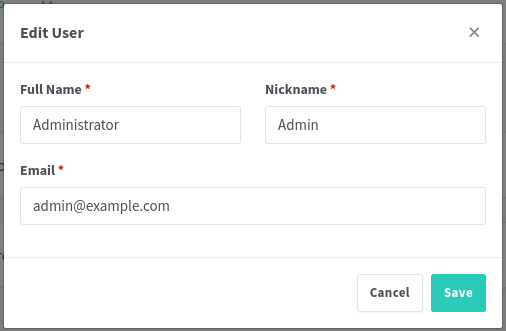
- Now it will prompt you to edit the current admin user.
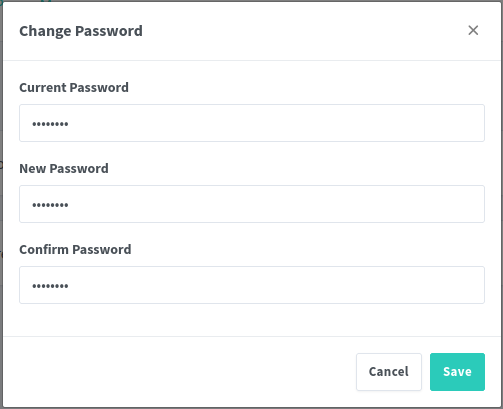
- Then the password for the admin user. Make it strong if you plan to use this setup.
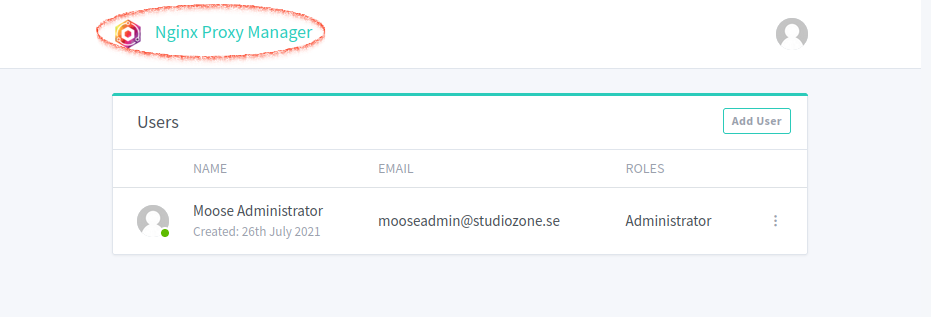
- When that is done you will end up in the user page overview. Click on the Nginx Proxy Manager logo to enter the Dashboard page.
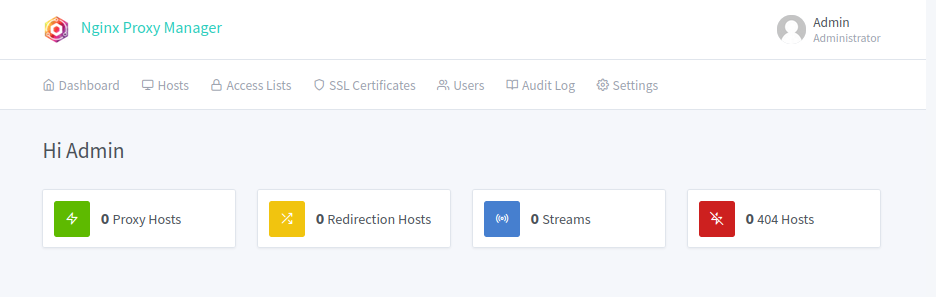
- This is the dashboard, and here you have a good overview of what you can do. Now it’s a good time to take a break from here and create DNS names. So we can create SSL certificates for the Nginx Proxy Manager and Portainer site later.
DNS and Port Forwarding
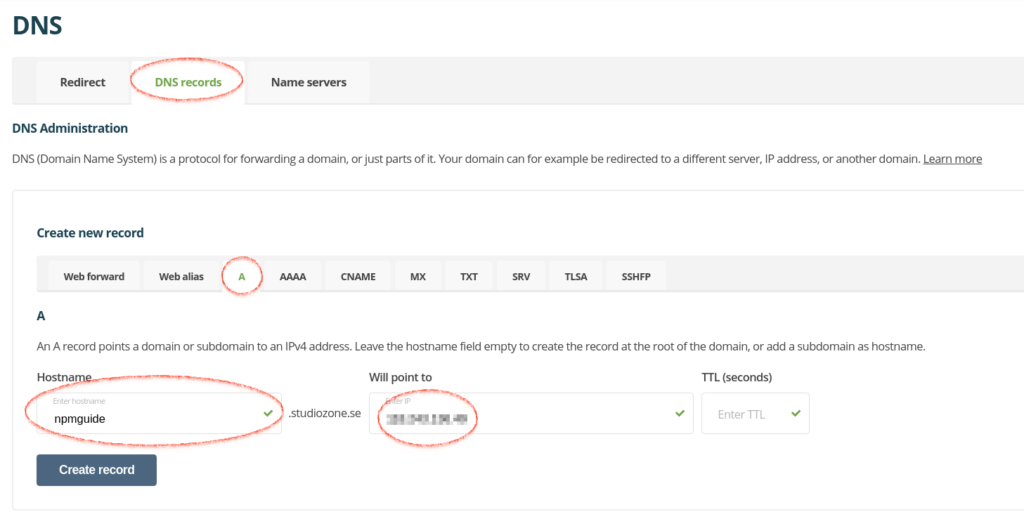
- I am using my domain host One.com to create sub domains for this guide. Every domain host has a different service, but for me it looks like this.
Create 2 DNS subdomains, example for me (npmguide.studiozone.se and portainerguide.studiozone.se). Then point that to your IP address on the internet.
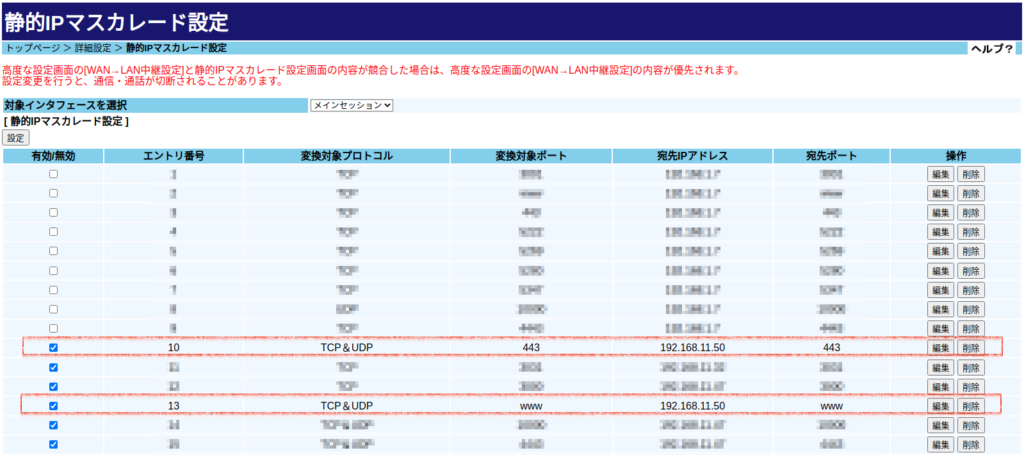
- Make sure that you also forward port 80 and 443 on your router to your server’s local IP address. This also differs a bit between routers, but it basically should look similar to this at the port forward section of your router (except mine are in Japanese).
Proxy Host Setup
- Now go back to your dashboard on Nginx Proxy Manager, click on Hosts and Proxy Hosts. On this page click on the button “Add Proxy Host”

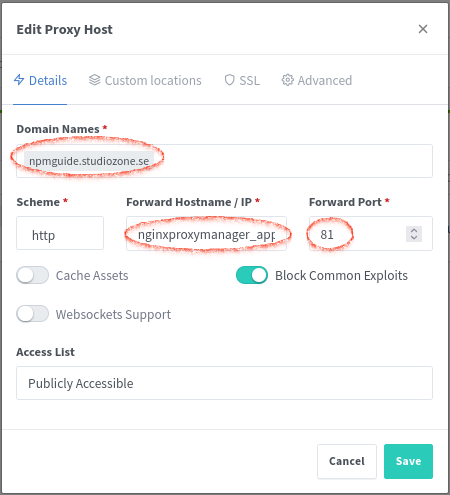
- Fill in your details:
- Domain names, enter here your DNS name here.
- Forward Hostname / IP, “nginxproxymanager_app_1”
- Forward Port, Nginx is using port 81.
- Turn on “Block Common Expoits”.
- Because we are using docker we can use the container id name instead of dockers internal IP address. And we wrote it down before, “nginxproxymanager_app_1”. This is good, because sometimes containers do get different IP when you restart the server. But the name is still the same.
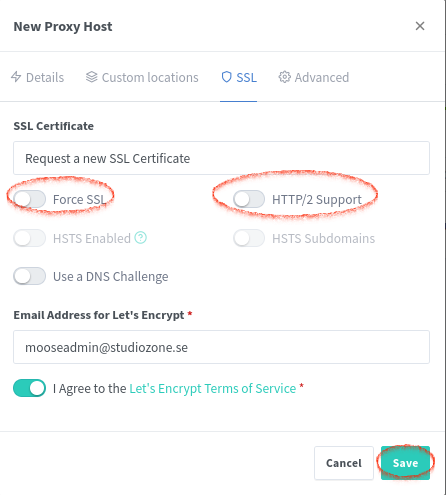
- On the SSL tab and request a new SSL Certificate, but do not turn on Force SSL and HTTP/2 Support yet. Enter your email, this is for getting notification when certificates are about to expire. Then Agree the terms.
- Repeat these steps for the Portainer.
Hosts IP fix and SSL activation.
- When trying to connect to the Nginx DNS name, in my case “npmguide.studiozone.se” and you are on the same local network you will probably not be able to connect to the manager.
To fix this you need to add the IP address and DNS name in the hosts file in the client computer (connecting PC). - For Ubuntu clients, you just open the terminal and access the hosts file with nano editor. See the command below:
sudo nano /etc/hosts
- We will add both DNS names to servers local IP addresses here. Make sure that IP address and DNS name match yours.
192.168.11.50 npmguide.studiozone.se portainerguide.studiozone.se
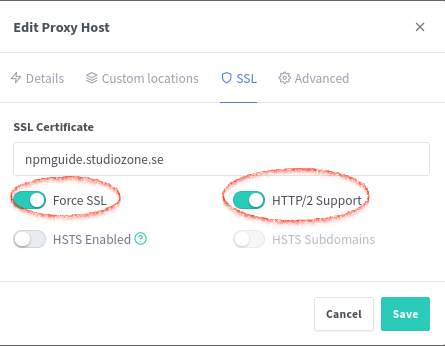
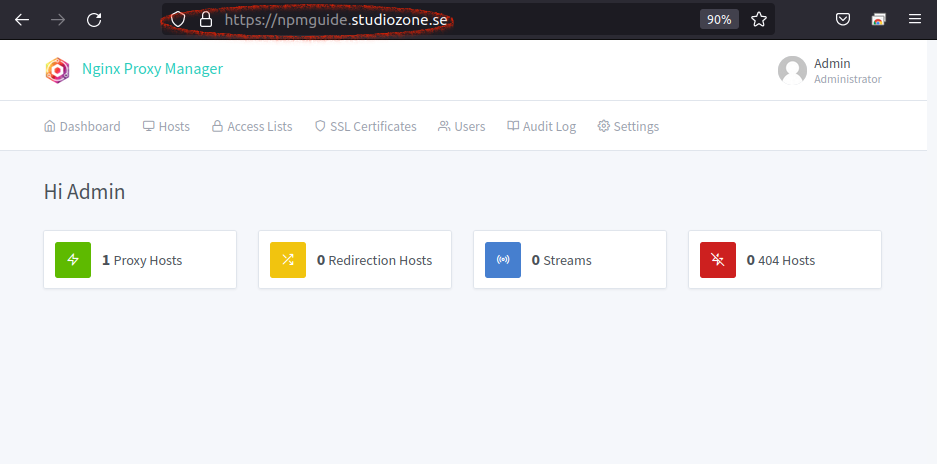
Now we can connect to the Nginx Proxy Manager by the DNS name. Go back to Proxy Host and edit both DNS, go to the SSL tab. Turn on Force SSL and HTTP/2 Support and save.
Refresh the page, and you see it has become a secured site now.
Redeploy the Portainer
- Try now connecting to the Portainer DNS name, in my case “portainerguide.studiozone.se”. You can’t access the site and get a “502 Bad Gateway” response. That’s because the container is not in the same isolated Docker network domain, you can see that in the Portainer page (if you connect to the Portainer by IP address).

- To fix this we need to redeploy the Portainer as we talked about before, but with a slightly modified deploy command. But first we need to remove the existing container. We do that by login in to server through SSH and use following command:
					sudo docker stop portainer
sudo docker rm portainer
- The old deploy command looked like this:
sudo docker run -d -p 8000:8000 -p 9000:9000 –name=portainer –restart=always -v /var/run/docker.sock:/var/run/docker.sock -v portainer_data:/data portainer/portainer-ce - What we want to do is to remove the public port to access this portainer. Because we want to control public ports from the Nginx Proxy Manager.
- -p 9000:9000
- Then to set the Portainer into the same network domain as the Nginx Proxy Manager, we need to write the network name. We put that at the same place as the public port was before.
- –network nginxproxymanager_default
sudo docker run -d -p 8000:8000 --network nginxproxymanager_default --name=portainer --restart=always -v /var/run/docker.sock:/var/run/docker.sock -v portainer_data:/data portainer/portainer-ce
- Now when we try to connect to the Portainers DNS “portainerguide.studiozone.se” we do connect with a secured HTTP connection.
Summary
This is all for this post. Sorry if the post got too long, I was trying to make it short as possible without missing important steps.
If something is not clear or needs more explanation please comment and explain it. I will gladly read and try to answer them all.
Keep tune in here for the next post about “Rocket Chat” setup.
Until next time, stay safe and happy experimenting.