
Table of Contents
Preparation
To follow this guide you need to have Portainer and Nginx Proxy Manager installed. If you don’t have that please refer to the previous guide of this series.
Rocket.Chat
Rocket.Chat is a secure communication tool. With Rocket.Chat can you Centralise all the communication of your projects, avoid missing information and make sure your team works better. Its a good Slack alternative.
You can connect to the chat with a browser and with a client application. These client applications are available for Windows, Mac OS, Linux, Android and IOS.
In this post we will setup Rocket.Chat, create a DNS subdomain name and create an SSL Certificate. Make important settings in Rocket.Chat, like making the chat only accept invitations and register members.
Deploy
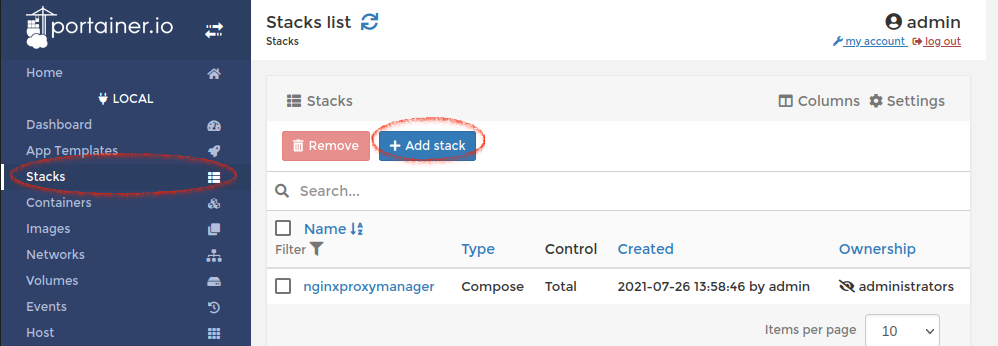
- Like we did when we installed the Nginx Proxy Manager, login to Portainer and choose your local Docker. Then click “Stacks” on the left menu and then “Add stack”.
- Name the new stack “rocketchat”.
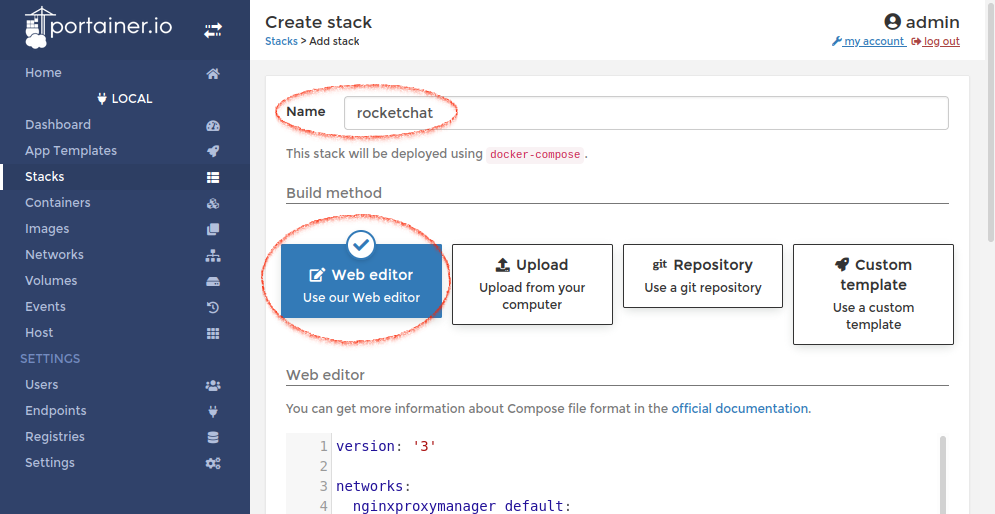
Then paste this composer example code into the “Web editor” window. This Docker compose file sample is taken from the Rocket.Chat github. It is slightly modified to fit our needs.
Don’t forget to edit the root url to match your DNS name. Hubots user, password and name.
Make the password strong if you plan to put this setup on the internet.
These are the rows you should edit.
- row 23: – ROOT_URL=http://chatguide.studiozone.se
- row 78: – ROCKETCHAT_USER=moosebot
- row 79: – ROCKETCHAT_PASSWORD=greenforest
- row 80: – BOT_NAME=moosebot
- If you have a different Nginx Proxy Manager network name you need to change to that name at:
- row 4: nginxproxymanager_default:
- row 37: nginxproxymanager_default
- row 49: nginxproxymanager_default
- row 69: nginxproxymanager_default
- row 93: nginxproxymanager_default
					version: '3'

networks:
  nginxproxymanager_default:
    external: true

services:
  rocketchat:
    image: registry.rocket.chat/rocketchat/rocket.chat:latest
    command: >
      bash -c
        "for i in `seq 1 30`; do
          node main.js &&
          s=$$? && break || s=$$?;
          echo \"Tried $$i times. Waiting 5 secs...\";
          sleep 5;
        done; (exit $$s)"
    restart: unless-stopped
    volumes:
      - ./uploads:/app/uploads
    environment:
      - PORT=3000
      - ROOT_URL=http://chatguide.studiozone.se
      - MONGO_URL=mongodb://mongo:27017/rocketchat
      - MONGO_OPLOG_URL=mongodb://mongo:27017/local
      - MAIL_URL=smtp://smtp.email
      #- HTTP_PROXY=http://proxy.domain.com
      #- HTTPS_PROXY=http://proxy.domain.com
    depends_on:
      - mongo
    #ports:
      #- 3000:3000
    labels:
      - "traefik.backend=rocketchat"
      - "traefik.frontend.rule=Host: your.domain.tld"
    networks:
      - nginxproxymanager_default

  mongo:
    image: mongo:4.0
    restart: unless-stopped
    volumes:
      - ./data/db:/data/db
      #- ./data/dump:/dump
    command: mongod --smallfiles --oplogSize 128 --replSet rs0 --storageEngine=mmapv1
    labels:
      - "traefik.enable=false"
    networks:
      - nginxproxymanager_default

  # this container's job is just run the command to initialize the replica set.
  # it will run the command and remove himself (it will not stay running)
  mongo-init-replica:
    image: mongo:4.0
    command: >
      bash -c
        "for i in `seq 1 30`; do
          mongo mongo/rocketchat --eval \"
            rs.initiate({
              _id: 'rs0',
              members: [ { _id: 0, host: 'localhost:27017' } ]})\" &&
          s=$$? && break || s=$$?;
          echo \"Tried $$i times. Waiting 5 secs...\";
          sleep 5;
        done; (exit $$s)"
    depends_on:
      - mongo
    networks:
      - nginxproxymanager_default

  # hubot, the popular chatbot (add the bot user first and change the password before starting this image)
  hubot:
    image: rocketchat/hubot-rocketchat:latest
    restart: unless-stopped
    environment:
      - ROCKETCHAT_URL=rocketchat:3000
      - ROCKETCHAT_ROOM=GENERAL
      - ROCKETCHAT_USER=moosebot
      - ROCKETCHAT_PASSWORD=greenforest
      - BOT_NAME=moosebot
  # you can add more scripts as you'd like here, they need to be installable by npm
      - EXTERNAL_SCRIPTS=hubot-help,hubot-seen,hubot-links,hubot-diagnostics
    depends_on:
      - rocketchat
    labels:
      - "traefik.enable=false"
    volumes:
      - ./scripts:/home/hubot/scripts
  # this is used to expose the hubot port for notifications on the host on port 3001, e.g. for hubot-jenkins-notifier
    ports:
      - 3001:8080
    networks:
      - nginxproxymanager_default
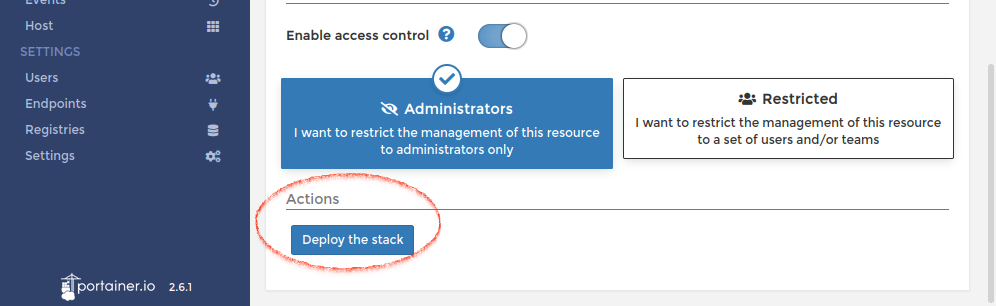
- Then press on “Deploy the stack”.
This can take time if it’s the first time you are doing this. When it’s done a new page appears.
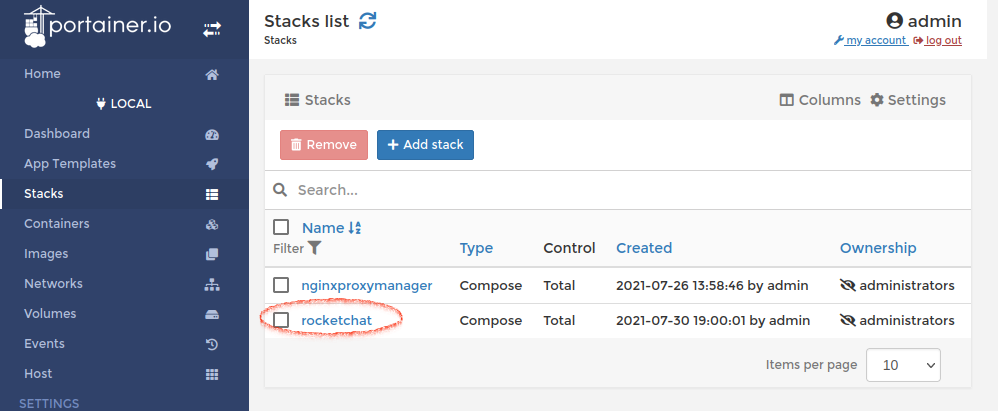
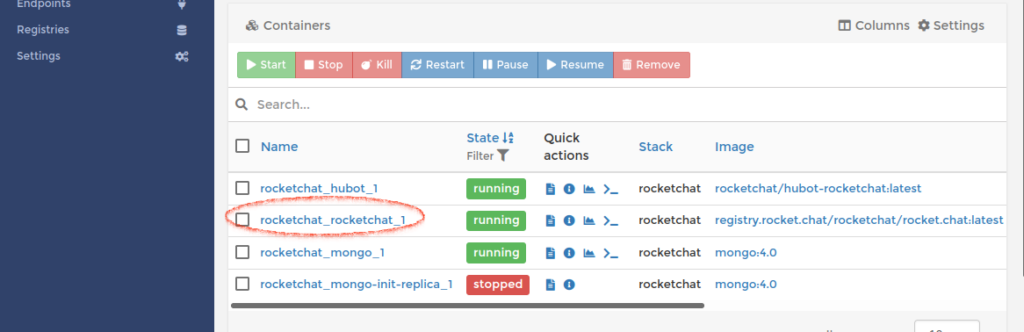
- When it’s done, the browser returns automatically to the Stack list page and we will see the new stack we created “rocketchat”. Click on that name to see what container it runs.
Rocket.Chat is using 4 containers but only running 3 containers. That container that has stopped is only for initiating the MongoDB, and stops automatically when it is done.
Take a note on the name of the container that runs the application, “rocketchat_rocketchat_1”.
We will need that name later when we setup the Proxy Host in Nginx Proxy Manager.
Create a DNS name
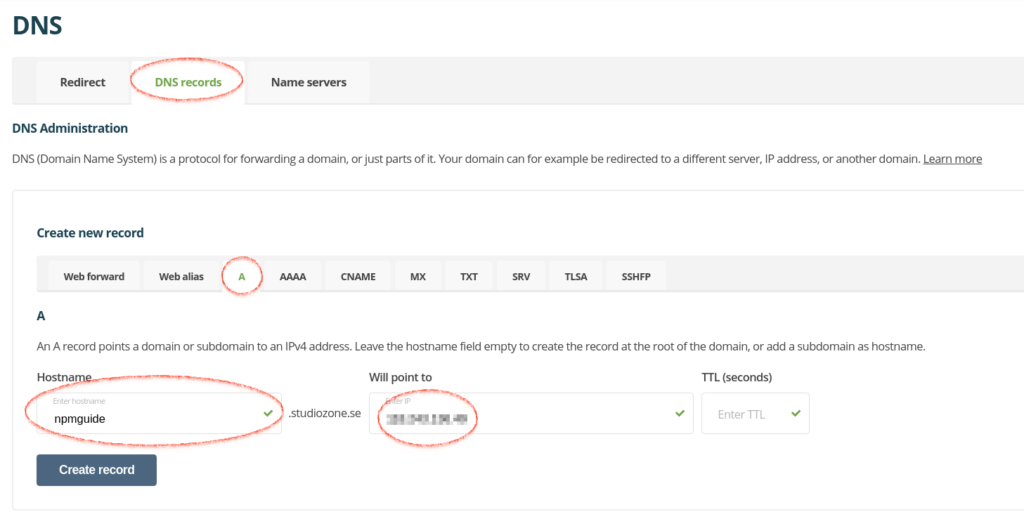
- Same as the previous post I am using my domain host One.com to create sub domains for this guide.
I named this DNS to (chatguide.studiozone.se). Then point that to my IP address on the internet.
Proxy Host Setup
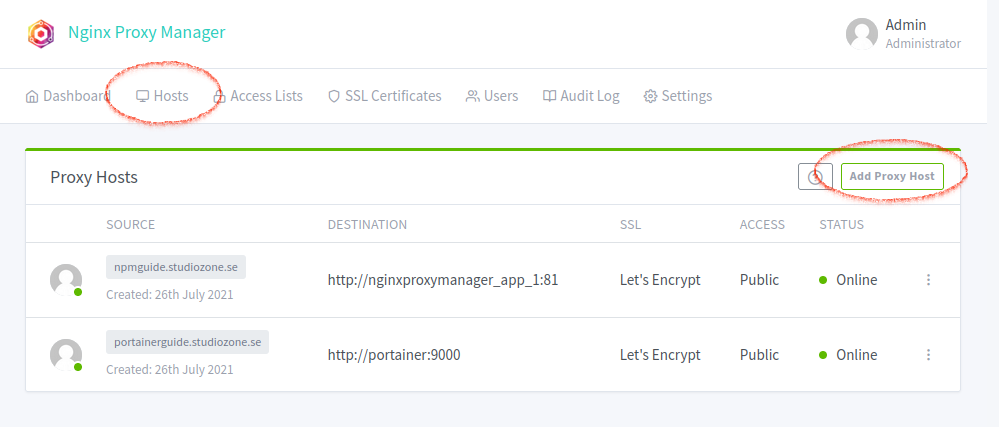
- Now go to your dashboard on Nginx Proxy Manager, click on Hosts and Proxy Hosts. On this page click on the button “Add Proxy Host”
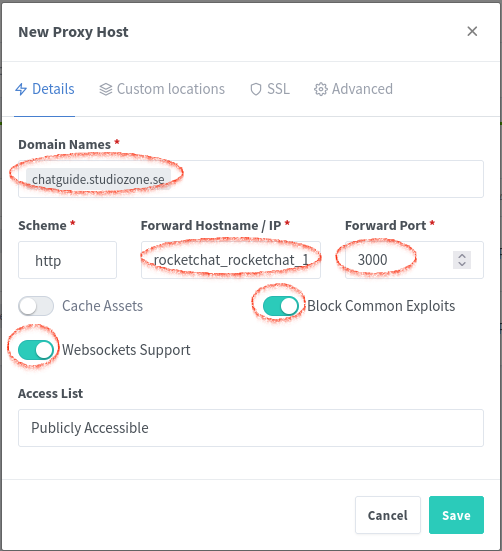
- Fill in your details:
- Domain names, enter here your DNS name here.
- Forward Hostname / IP, “rocketchat_rocketchat_1”.
- Forward Port, Nginx is using port 3000.
- Turn on “Block Common Expoits”.
- Turn on “Websockets Support”.
- Because we are using docker we can use the container id name instead of dockers internal IP address. And we wrote it down before, “rocketchat_rocketchat_1”. This is good, because sometimes containers do get different IP when you restart the server. But the name is still the same.
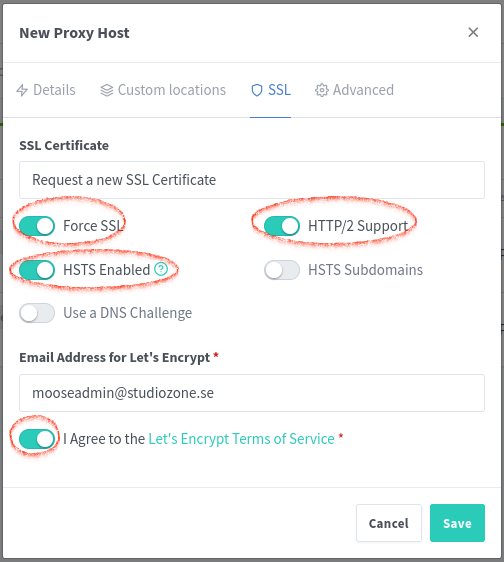
- On the SSL tab and request a new SSL Certificate, but this time turn on Force SSL, HTTP/2 Support and HSTS Enabled. Enter your email, this is for getting notification when certificates are about to expire. Then Agree the terms. After you have clicked “Save”, go back and confirm these settings. Sometimes you need to re-enable these SSL options.
Hosts IP fix for local network.
- When trying to connect to the Nginx DNS name, in my case “chatguide.studiozone.se” and you are on the same local network you will probably not be able to connect to the manager.
To fix this you need to add the IP address and DNS name in the hosts file in the client computer (connecting PC). - For Ubuntu clients, you just open the terminal and access the hosts file with nano editor. See the command below:
sudo nano /etc/hosts
- Add the new DNS names to servers local IP addresses here. Make sure that IP address and DNS name match yours. You can write it on the same line we created in the post before.
192.168.11.50 chatguide.studiozone.se npmguide.studiozone.se portainerguide.studiozone.se
- Now when we connect to the Rocket.Chat DNS “chatguide.studiozone.se” we connect it with a secured HTTP connection.
First time setup
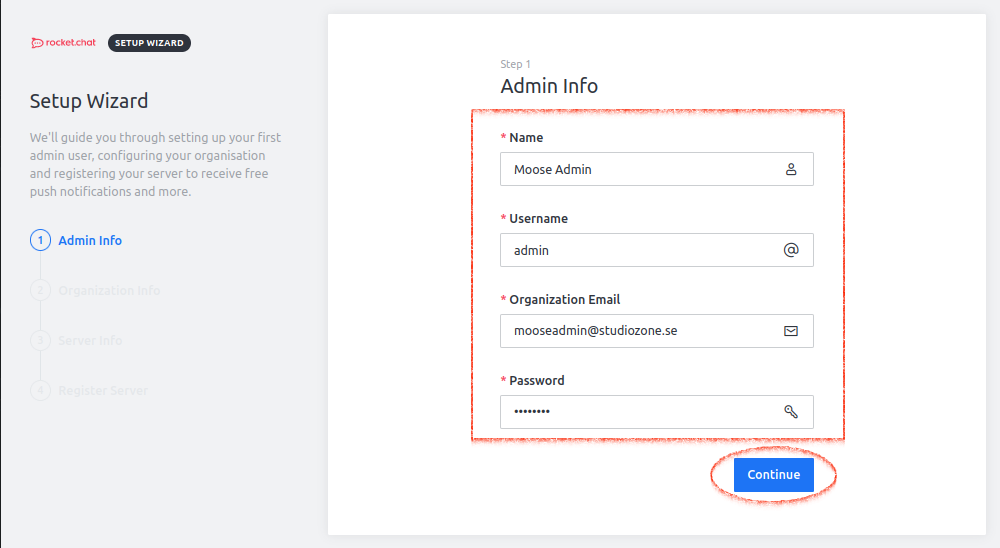
- When entering Rocket.Chat for the first time you have to write the Admin user account. Sometimes the process freezes when I click on “Continue”. Just refresh the page.
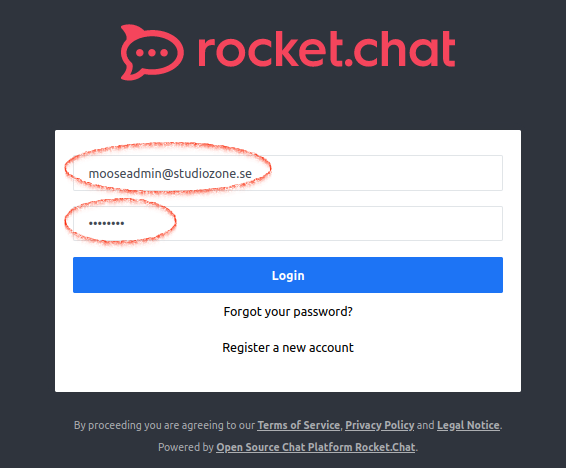
- Now enter the admin’s email and password you created for the Admin account.
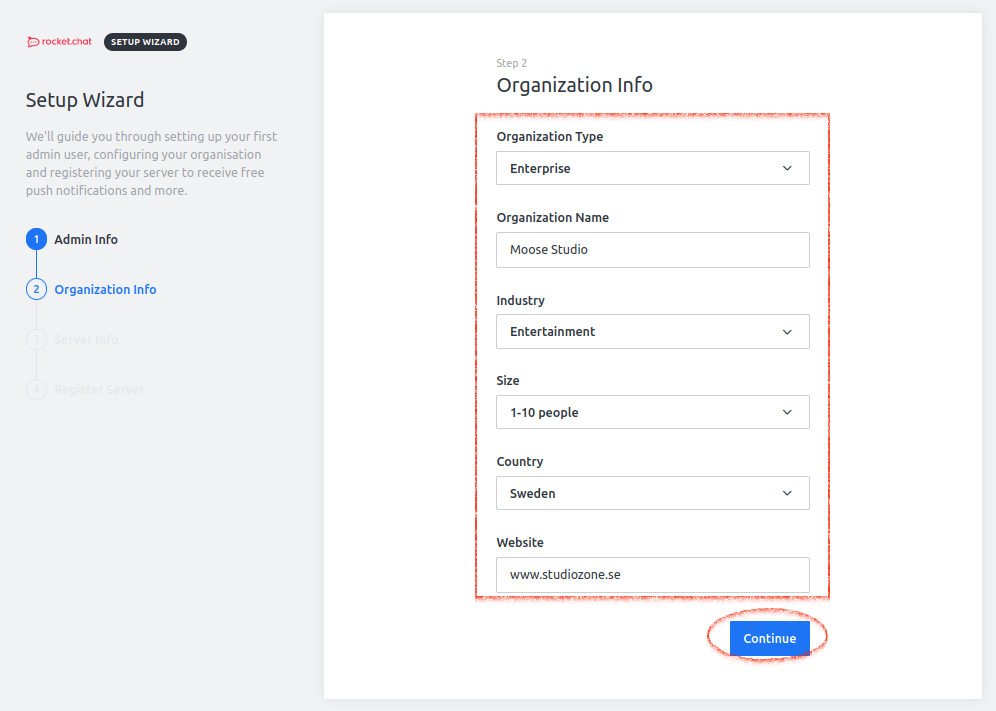
- Next is the organisation information.
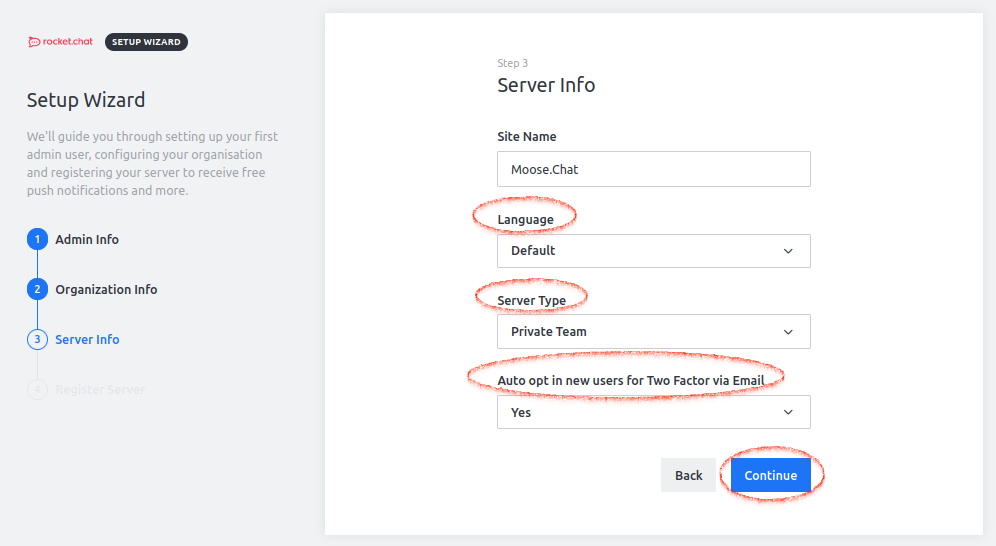
- Here you write the server information.
If you are using English as the default language on the server, but want to have the Chat in a different language as default like in Japanese. You should change the default language to Japanese here. You can always change that later when all setup is done.
Server Type choose “Private Team”, if you want to make it public you can change it later.
And use the “Auto opt in new users for Two Factor via Email”, this is a good step to prevent fake users coming into your chat. We will add more security to that later.
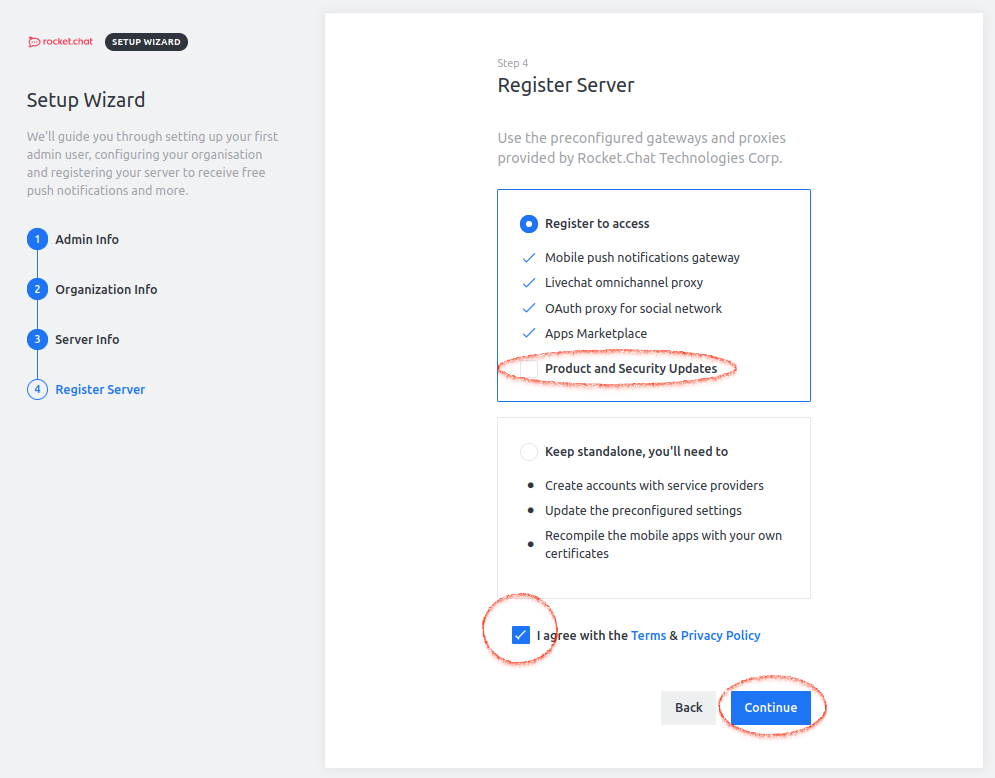
- Then the last step, Register the server.
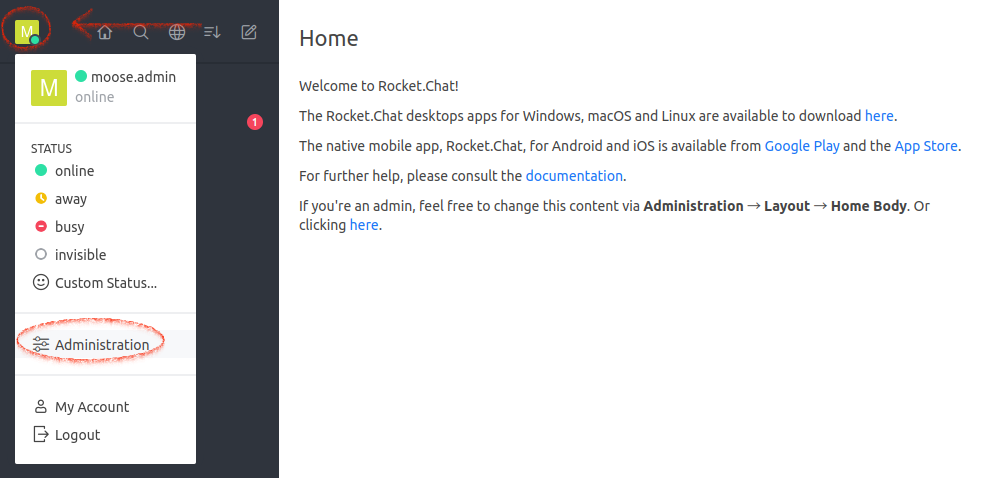
- Now we need to change the chat to more private, go to the administration section.
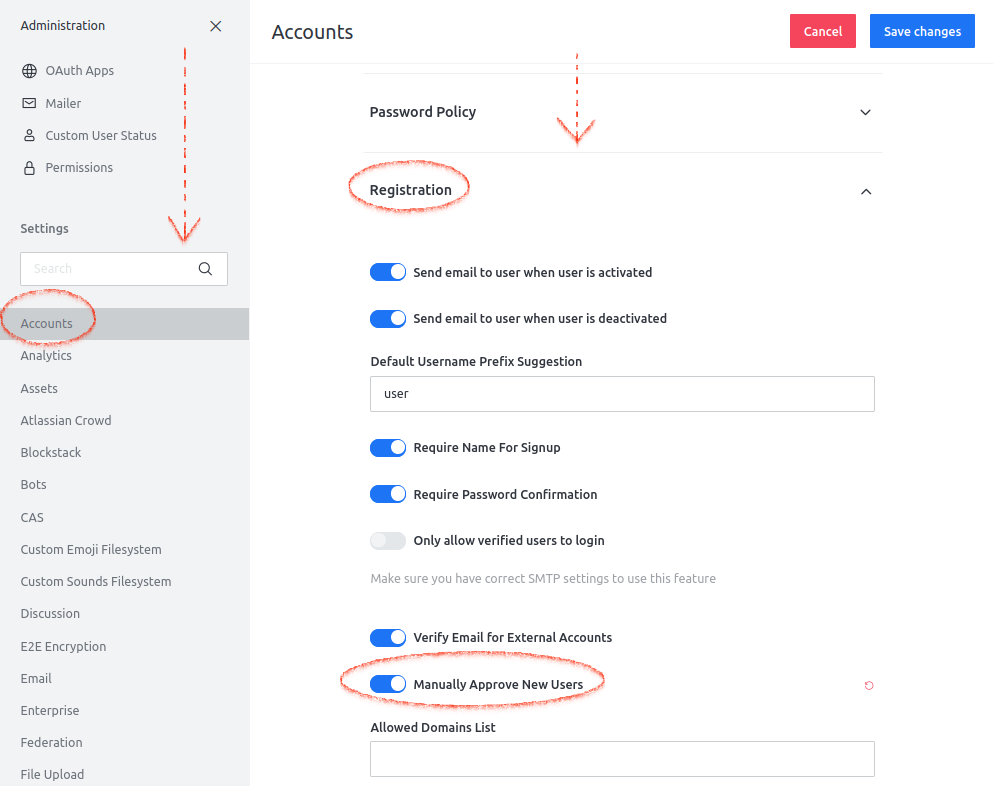
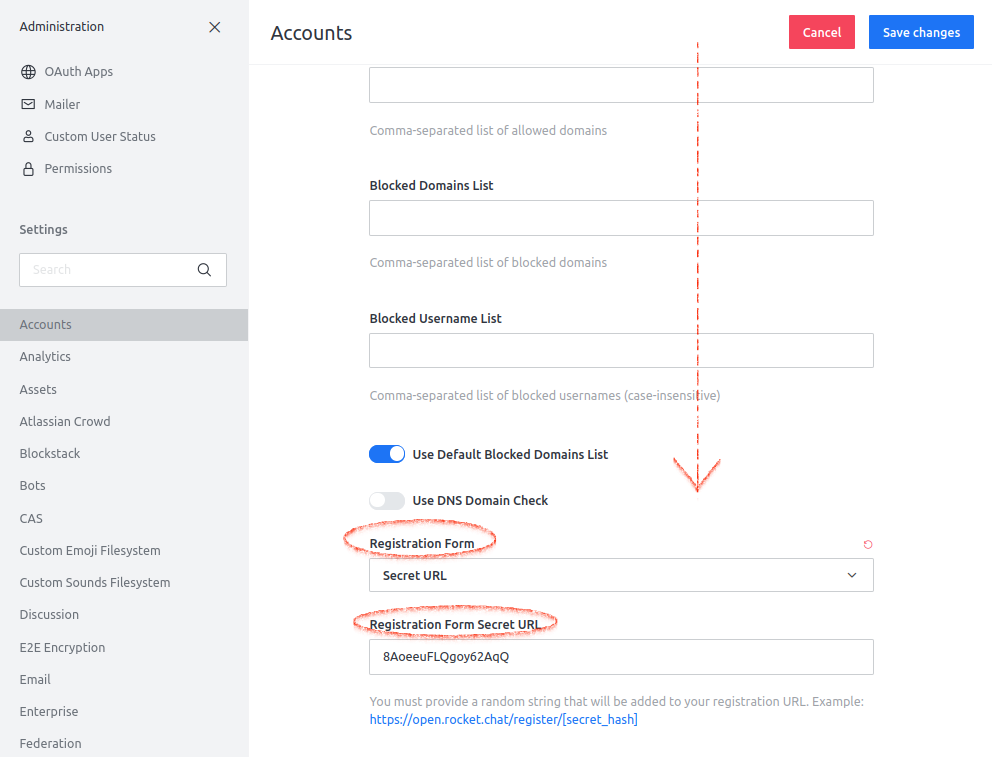
- Scroll down the left menu until you see “Accounts”, enter that section. Then scroll down on the right side and expand the “Registration” section and enable “Manually Approve New Users”.
- Continue scroll down on the right side until you see “Registration Form”, set that to “disable” or “Secret URL”. Edit the “Registration Form Secret URL” if you want. Then save the settings. Now is your chat safe for intrusion.
Summary
Now when the Rocket.Chat is installed, try to customise or experiment a little bit with it by yourself.
I will now take a small break, step back a bit and check these 5 early posts for any possible improvements. When that’s done, I will show how to customise the rocket chat. If there is any special customisation you would like to see, please comment below.
As usually if something is not clear or needs more explanation please comment and explain it also. I will gladly read and try to answer them all.
Keep tune in here for the next post about “Rocket Chat – Customisation”.
Until next time, stay safe and happy experimenting.